
I am often asked where the best places are to get cute accessories and outfits for portraits. Some of my favorites are Etsy & Zulily because they feature so many vendors. However, especially if there are a number of people in your family, purchasing numerous outfits and accessories for your session can get expensive quickly! What I often like to do is purchase one item-either accessory or outfit, and then make whatever else it is I need. I thought I would do a little tutorial to show you how it comes together 🙂

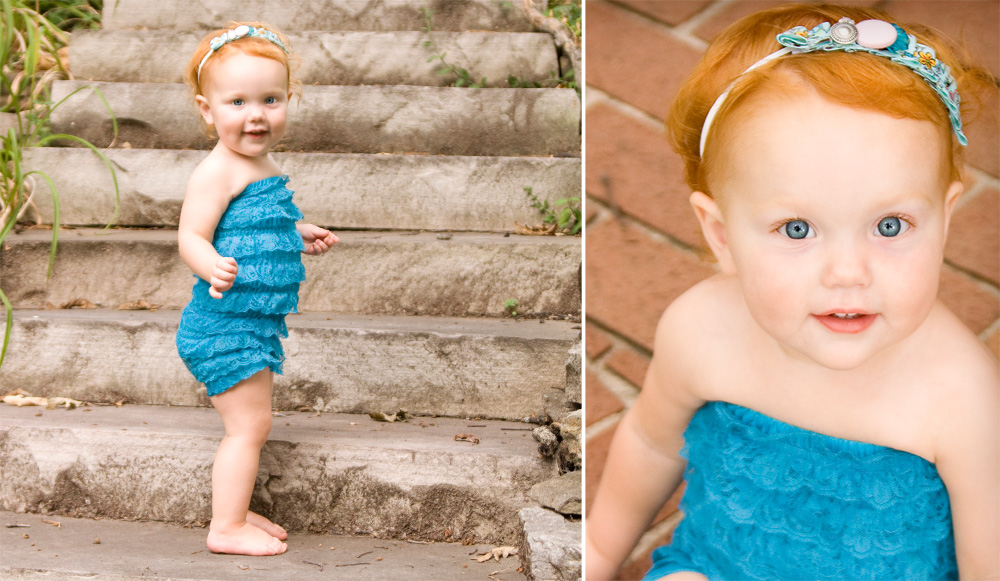
When I saw these rompers on Zulily a few weeks back, I had to get one for Audrina! It is adorable on its own, but I wanted to add a handmade accessory. After much debate about whether to make a necklace or headband, I decided to go with the headband. Had I purchased one online it would have run me between $12-$22. I was able to make the one you will see below for $0, using items I already had in my craft stash. Even if I had to purchase the ribbon or elastic it still would have cost me much less than buying one online….and this one is one-of-a-kind!….just for my little princess!

 1. Gather supplies you will need:
1″ ribbon, elastic (for headband)
buttons or jewels for embellishments
3/8″ coordinating ribbon (if desired)
pins, scissors, tape measure, hot glue gun
needle & thread, small piece of felt
2. Measure around your child’s head and subtract 1″ to figure length of elastic you need. Cut elastic and sew ends together.
3. Take your main ribbon and begin folding in pleats. Pin each pleat to hold it in place. Continue creating pleats until you reach desired length. (Completely personal preference! Mine measured about 5 1/2″) Cut ribbon and fold the end under and pin.
 4. Take your pleated ribbon to the sewing machine and run a straight stitch down the middle of the robin (Be sure to backstitch and beginning and end to secure ribbon) **You can hand sew down the middle of the ribbon, I used my machine b/c it was already set up and would be faster than sewing by hand! :)) Once you have sewn ribbon, remove pins and you should have a piece that looks like this:
 5. Now its time to embellish!! This is the fun part! I took some buttons with difference texture and colors and laid them out until I liked what I had. I also used my coordinating ribbon at this point and hot glued a few loops of it under my largest button. You can sew or use hot glue to hold on your embellishments. If the headband will be worn by a young child I recommend sewing the buttons on for safety.

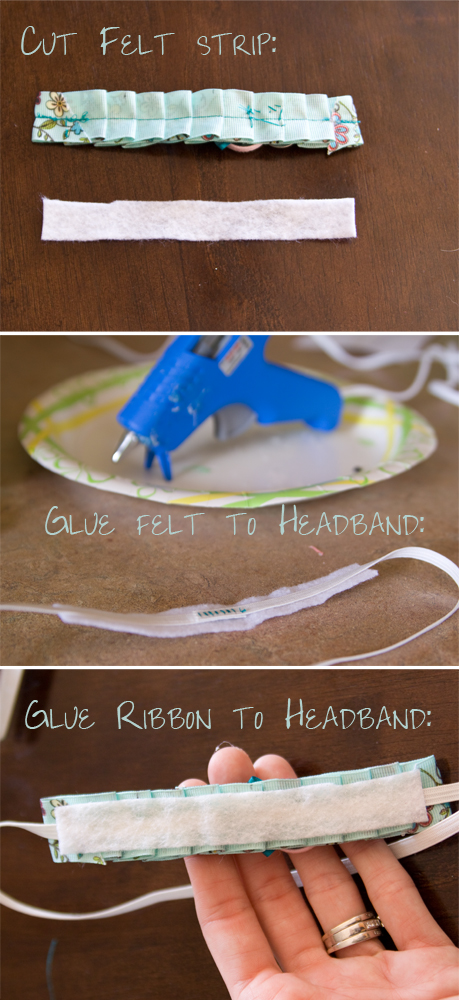
 6. Once your embellishments are secured, its time to assemble! Cut a thin piece of felt (shorter and skinnier than your ribbon) You will sandwich the headband between the ribbon and felt. The felt will be soft against the child’s head and *hopefully* help them keep it on longer!
Run a strip of glue down the length of the felt and set the elastic headband on your glue strip. Next, run a strip of glue down the back side of your pleated ribbon and set it on top of the elastic.
And that’s it!! You have a beautiful handmade accessory in under a half hour. Even if you are not very crafty YOU CAN MAKE THIS!!! If you try it out I would love to see pictures! Here is my lovely model in her romper and headband mommy made:.jpg "FINISHED")